Skip to content

Installation guide
Install Cyclop OS
A complete step-by-step guide to install Cyclop OS on your system, whether you are migrating from another operating system or setting up a dual boot.
What you need before installation
- A computer that meets the minimum system requirements.
- A USB flash drive with at least 5 GB of storage for the installer.
- An external hard drive or cloud storage to back up important files before you begin.
Step 1: Download Cyclop OS
If you have not already, download Cyclop OS from the official download page. Choose the edition for your hardware and save the ISO file to your computer.
Step 2: Back up your data
Before proceeding, we strongly recommend backing up important files to an external drive or cloud storage. If you plan to dual boot alongside another system, this step is optional, but backing up is always good practice.
Step 3: Create an install drive
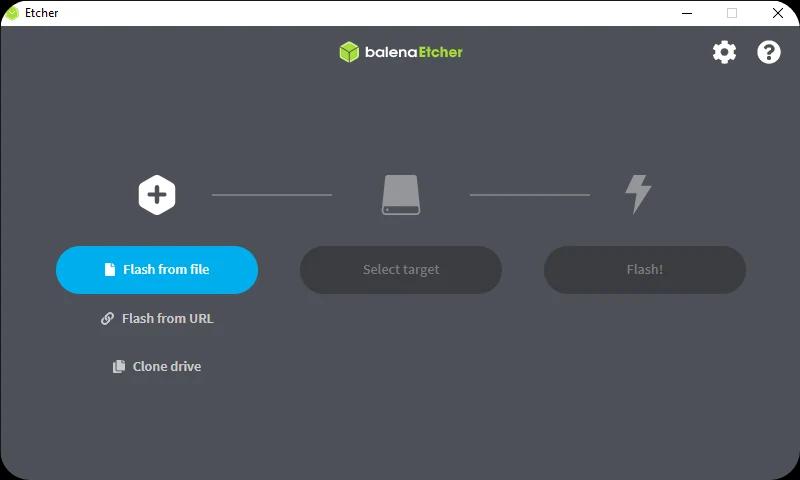
To install Cyclop OS you need a bootable USB drive, created with a tool like Balena Etcher.
- Download and install Balena Etcher.
- Insert your USB flash drive.
- Open Balena Etcher and select Flash from file.
- Choose the Cyclop OS ISO file.
- Select the USB drive as the target.
- Click Flash! and wait a few minutes for it to finish.
Step 4: Boot from the USB drive
- Make sure the USB install drive is plugged in.
- Restart your PC and open the boot device menu (usually Esc, Delete, or F12 during startup).
- Select the USB drive from the boot menu.
- Choose Try or Install Cyclop OS from the welcome screen.
- Let the system verify the drive for a smooth installation.
The installer walks you through language, disk, and account setup. If you hit an account step error, check your internet connection and try again.

© 2026 Cyclop Technologies. All rights reserved.